For the parts, I used the parts list, rather than the actual kit.
In the parts list, it has "launch lugs and recovery system as necessary
for safe operation ".
I expanded this to:
The motor clip from the parts list was not used.
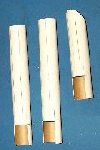
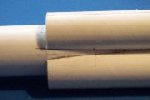
Two 5" lengths, and a 3
1/2" length were cut from the BT20.
Using the "BT20 Main Wrap", all three tubes were marked and lined.
Using the "BT20 Top Tube Wrap" (and aligned on the 'B' line) a
diagonal was drawn around one end of the 3 1/2" tube.
Each tube was marked at 7/8" along the 'C' lines (at the opposite end from the
diagonal on the short tube), and this rectangular section was cut out, and the bits
saved for later.
The diagonal was cut off the end of the short tube. |
 |
| The three tubes were then glued together, along the 'S' lines, with the cut out bits forming a
BT20 size 'hole' in the middle.
|
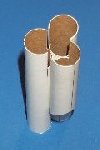 |
1 3/4" was cut from the rest of the BT20 for the front
coupler.
One of the centering was rings glued to the top of it.
The two extra rings were then cut from the card stock, and glued together,
halfway down the coupler.
This was then glued into the gaps between the three tubes, ensuring it was
straight and in line |
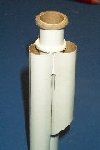 |
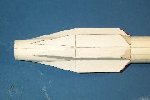
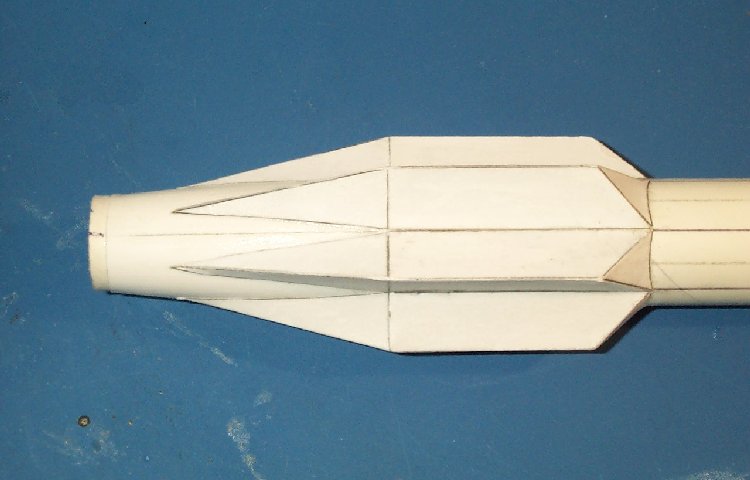
| A 5 1/2" section was cut from the BT50, and was marked using the "BT-50
Top Wrap". The tube was slit along these lines for 1 1/2 " The smaller sections
were then trimmed into a tapering
triangle shape. |
 |
The BT50 section was then glued onto the front coupler, with the large
sections sliding inside the BT-20 tubes, and the triangular sections on
the outside.
The triangular sections were then glued down into the gaps between the
BT-20 tubes, forming a sort of transition. |
 |
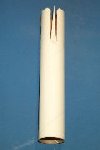
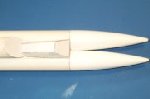
The three top transitions and the coupling collars were then cut from
the card sheet, and rolled around one of the BT-20 nose cones to get the
basic shape.
Using a collar, each one was joined to the end of one of the BT20 tubes,
and the edges stuck onto the BT50.
After this was all dried, I applied a thin coat of CA over the whole area
for strength, and then sanded it smooth. |
 |
The oval end cap and cabin housing were cut from cardstock. The cap was
stuck onto the angled end of the shorter BT20, and the cabin formed and glued on
in front of it.
The two nose cones were then attached to the longer tubes. |
 |
A 2 1/2" length was cut from the BT50. A section was then cut out
of the side, to make it the same size as BT50 coupler. The rectangular
sections cut from the BT20 front tubes (well, two and a bit of them
actually) were stuck on the inside to keep it together.
The detached shoulder from the BT50 nose cone (called the BT50 bulk head
in the parts list) was cut in half, and a loop of kevlar tied through the
bottom bit.
This was then glued into the forward end of the coupler. The whole coupler
was then glued halfway into the top BT50 tube. |
|
|
|
The end was then cut off the BT50 nose cone, leaving it about 2
1/4" long. With a bit of sandpaper wrapped around a spent 18mm motor,
the inside was sanded out until the remaining length of BT20 (the motor
mount) could pass through. This left the tail cone 2 1/10 " long.
The other part of the nose shoulder was glued into place on the wider end.
The other centering ring was stuck on the end of the motor mount,
then this unit was glued inside the tail cone. About 1/8" of motor
mount stuck out of the bottom of the cone.
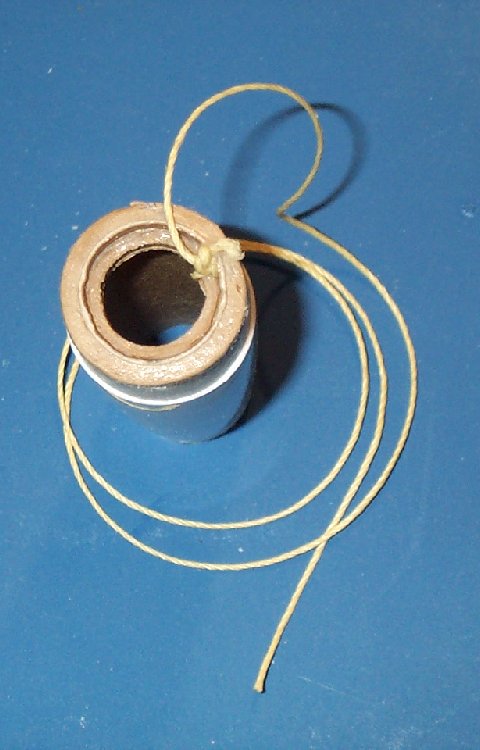
A 12" length of kevlar was then tied to a 1/4" section cut from
a used motor case and this was glued inside the top of the motor mount. A
loop was tied in the other end of the kevlar.
|
|
|
|
The remaining 10" of BT50, was then marked up using the 'BT50 Base
Wrap', before the tail cone was glued to it. The 'F' lines were extended
down the tail cone.
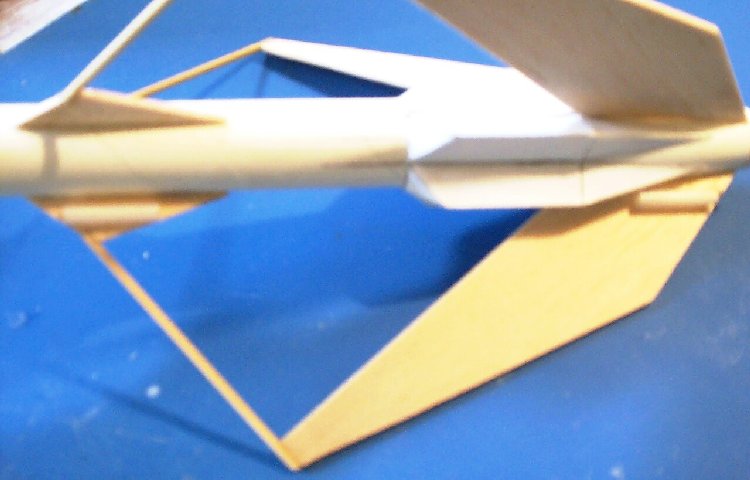
From the card stock, the six rear pods were cut out and glued
together.
These were then glued onto the BT50, along the 'P' lines, with the end of
the straight section of the pods in line with the end of the tube. |
 |
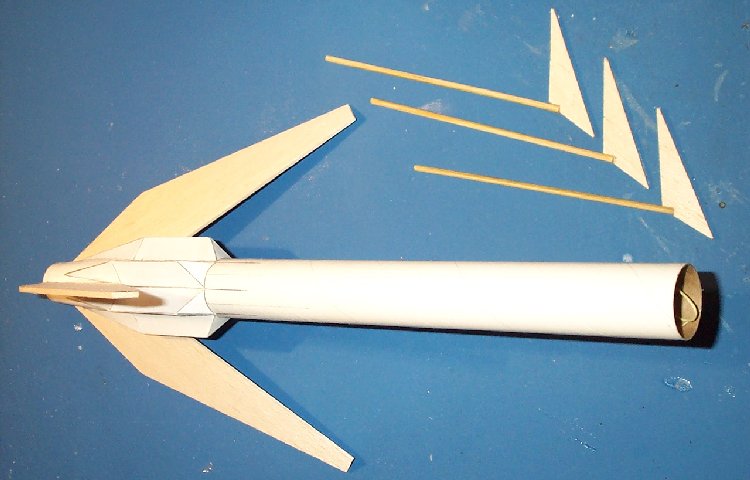
Using the fin templates, the fins were marked out (the
layout can be found here) on the balsa sheet, then cut
out. They then had a couple of passes through the 'sand - sanding sealer -
sand' process.
The main fins were than attached to the tail cone along the 'F' lines.
The dowel was cut into three equal pieces, and glued onto the small
forward fins. |
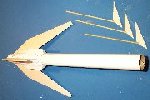 |
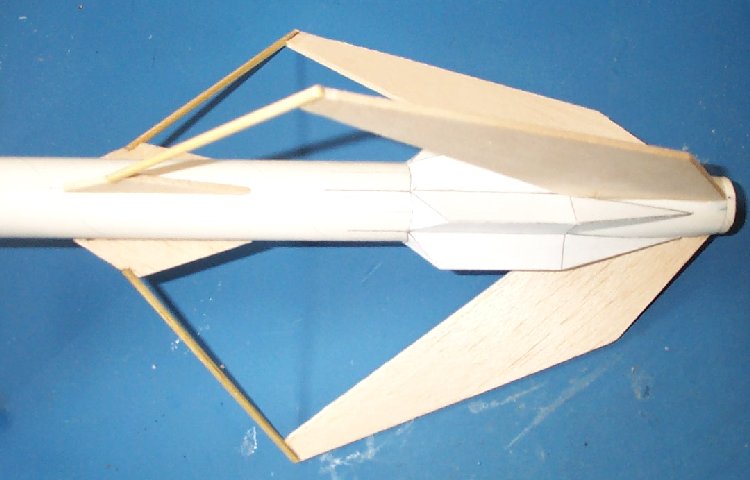
| The forward fins were glued onto the body, in line with the main fins,
with the leading edge 3.9" from the top of the air frame. The top end
of the dowels was glued to the tip of the main fins, and after the bond
had set, were trimmed and sanded to the correct size and angle. |
 |
| A 1" launch lugs was glued onto a forward and matching main fin.
These were positioned to allow the launch rod to pass between the main fin
and the rear pod. |
 |
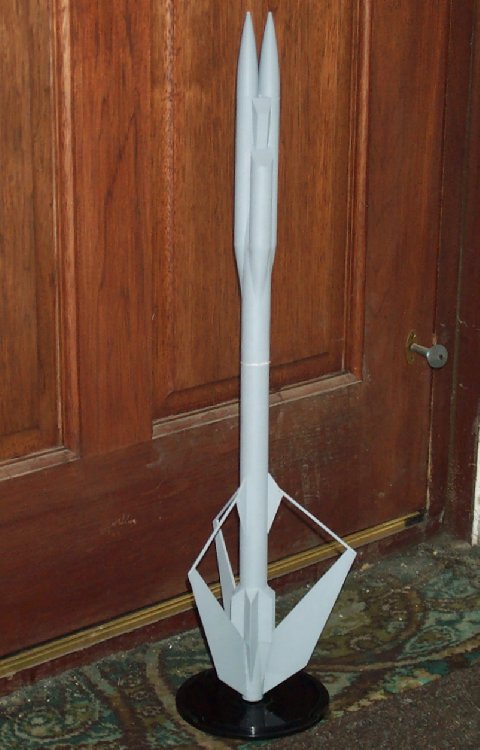
| Finally, the completed rocket was sprayed with a coat of primer, two
foot of 1/8" elastic was was tied between the loops in the kevlar,
and the 18" parachute was attached to the top loop. It was now ready for
flight testing. |
 |
